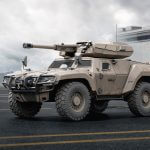
The M1A4 Battle Tank is the undisputed “King of Land Warfare,” revered for its heavy armor, devastating firepower, and unparalleled versatility on the battlefield. The M1A4 is a heavily armored combat vehicle designed for maximum battlefield effectiveness. It is equipped with a powerful main cannon, secondary weapons, and advanced defensive systems. This tank’s success relies on the coordinated efforts of its three primary combat positions: the driver seat, weapon station, and weapon pod.
This guide covers every critical aspect of operating the M1A4, ensuring you can master its systems to dominate your adversaries.
Key Combat Roles
1. Driver Seat
The driver controls the tank’s movement and tactical positioning. Here are the primary responsibilities:
- Movement Control: Engage or disengage from combat efficiently.
- Weapon Configurations: Reconfigure secondary weapons to suit your combat style as the vehicle levels up.
Secondary Weapons:
- Coaxial Light Machine Gun: High fire rate, shorter range, and moderate damage. Best against infantry.
- Coaxial Heavy Machine Gun: Lower fire rate, longer range, and higher damage. Effective against vehicles.
Primary Weapon: Main Cannon
The main cannon’s versatility depends on the shells used:
- Armor-Piercing Shells: Versatile for both infantry and vehicles.
- High-Explosive Shells: Larger blast radius, ideal for infantry but less effective against armored targets.
- Armor-Piercing Fin-Stabilized Discarding Sabot (APFSDS): Exceptional for vehicle strikes with minimal drop and high speed but ineffective against infantry.
Defensive Systems:
- Smoke Grenades: Deploy smoke to obscure enemy vision in emergencies.
- Thermal Smoke Grenades: Disrupt tracking and missile locks.
- Emergency Repairs: Quickly fix damaged components and restore durability.
- Active Defense: Detect and destroy incoming shells but has a long cooldown.
2. Weapon Station
The weapon station operator manages machine guns designed for eliminating infantry and unarmored targets:
- Light Machine Gun: High fire rate for close-range engagements.
- Heavy Machine Gun: Precise and damaging, suitable for distant targets.
3. Weapon Pod
The weapon pod features five options to address various combat scenarios:
- Rocket Barrage: Effective against vehicles; limited infantry impact.
- Kinetic Grenades: Ricochet capabilities for enemies behind cover.
- 40mm Canister Round: Devastating close-range damage against infantry.
- Multi-Weapon Pod: Fires grenades over a wide area, ideal for defensive positions.
- Mortars: High-damage but challenging to master; effective against grouped enemies or vehicles.
4. Passenger Seat
An additional operator, such as an engineer, can join as a passenger to perform emergency repairs, significantly improving combat efficiency.
Tactical Tips for M1A4 Operators
- Maintain Awareness: Constantly monitor the environment and watch for threats, especially from above.
- Avoid Isolation: The M1A4’s low mobility makes it vulnerable when unsupported by infantry.
- Use Coordinated Tactics: Maximize your tank’s capabilities with effective teamwork and communication.
- Adapt to Threats: Switch weapons and defensive systems depending on the enemy’s tactics.
Conclusion
Mastering the M1A4 Battle Tank requires dedication, practice, and teamwork. By utilizing its advanced systems and coordinating effectively with your squad, you can ensure tactical superiority on the battlefield. Remember, success comes not just from firepower but from smart strategies and seamless collaboration.
Good luck, Operators!